Showing posts with label crochet. Show all posts

Sunday, September 30, 2012

kitchen string crochet bowl and placemat


When I completed my last crochet project - the huge grey blue yellow and green blanket for my older son - I wanted my next one to be something quick to finish. Not sure where I got the idea, but I decided to have a go at crocheting something round and about the same time I spotted some kitchen twine, it looked like a plain unbleached cotton to me, whilst trawling the local supermarket. After a quick search I went with the Attic24 tutorial for crocheting a flat circle and quickly knocked up a cute placemat type thing with the cotton,  doing the final two rounds in the leftover grey cotton (Jo Sharp - Fog) from the big blanket. Actually I had to alter the design a little as after 10 or so rounds it wouldn't sit flat anymore, so mine had 10 'segments' rather than 11. This may be due to a difference in yarn weight? The cotton string is a bit thinner than the usual 8-ply cotton I use, but denser, and I used a 3.5mm crochet hook. And as you can see the resulting shape isn't awfully round, more a decagon!

I wanted to see if I could finish the last round before the yarn ran out. Nope.


Part way through, loving this make things quickly approach, I decided a little bowl using the same materials and technique would soon follow. I figured if you just stop increasing after you'd made the size circle you wanted, you'd get a bowl. So off I went...


And really that's all there was to it! When it was first completed the bowl was much rounder at the bottom, the bottom edge wasn't a sharp corner, but over time it has settled and now has a much squarer profile. I think this heavy little collection of shells that mr.5 picked up one day helped!

Friday, August 17, 2012

The big blue green yellow and grey crochet blanket

I love finishing a project! Unless of course I really don't want to finish it, like that scarf. Anyway this one I really did want to finish, and so here it is, all done. It is intended for my 5 year old but I'm having trouble letting go of it, so it's still out on the sofa. 

I wish I'd kept track of how much yarn and time has gone into it, but it was a fairly organic process. I started out intending to use up some yarn from my stash but have ended up with more than I started with! I'd originally wanted it to be mostly shades of yellow which proved incredibly hard to get hold of in cotton. Instead lots of blue and green and just a little yellow was added. Grey (Jo Sharp cotton in Fog) ended up being the background colour.

It is a basic crochet blanket, 140 granny squares, join-as-you-go joining method, with two very simple rounds at the end to edge it - one row of single crochet, one row of half double crochet. It is big enough to decorate a single bed, the last photo shows my husband holding it up, he isn't that tall, maybe 5'7", but as you can see the blanket is bigger than he is.


Sunday, June 12, 2011

a quick status update on blankie

Believe it or not, 80 squares are now done! I'm slower than I hoped, but not too surprised - I always hope I'll get more done than I can. I've introduced some more colours since the last update - but have been quite frustrated in my search for a good range of colours in cotton yarn. Does no-one else find wool itchy?

At this stage I am planning to do the final join-as-you-go round in the same grey that edges all of the squares. I think introducing white at this stage would be a bit jarring, or better suited if it was a babies blanket. Here's a quick photo of my stacks of squares - there are ten squares per stack, and then I'd better get back to it!

Friday, April 15, 2011

grey blue green and yellow

I said I'd blog my second crochet project, and here it is! The plan for this one is that it will be a blanket for my son's bed. When I first started crocheting up some left-over cotton I hadn't thought that far ahead, but looking at the colours I think it will be good for his room. If he gets too old for it then it would probably suit our bed too, as a blanket across the bottom of the bed.


Just looking at this photo I'm realising how different in size some of the squares are! Because I'm using leftovers, and buying odd balls here and there, the yarns are quite different thicknesses, even though they all recommend the same needle size. Some of the yarns I've used so far are:
  • Jo Sharp Soho Summer dk cotton in Fog (I need so much more of this! It's the grey every square will be finished in!)
  • Jo Sharp Soho Summer dk cotton in Shamrock
  • Heirloom cotton 8-ply in denim blue (I have some of this in a dark navy blue too)
  • Heirloom cotton 8-ply in yellow
  • Heirloom cotton 8-ply in pale lime (the heirloom yarns are by far the thinnest yarn)
  • Sugar'n'cream cotton 8-ply in turquoise (very thick, would love more of this in various colours)
  • Twilley's of Stamford Freedom Denim - desperately seeking more of this discontinued yarn, it's the middle colour in the top right square
  • Some unknown yellow cotton, middle of bottom left and right squares
  • Katia Mississippi, the dark lime/pistachio green, which is actually only 60% cotton
What I'm craving is more yellows! I have an interim solution for this, and that is to dye some plain white yarn. We'll see how that idea pans out after the Easter break.

My plan for this blanket is to do 10 squares of each colour combination, and then finish the blanket off by doing a final round in white, joining as I go. I have roughly estimated I will need about 192 squares, which quite frankly is terrifying! It seems an awful lot of squares! I'll need 15 more colour combinations! I'm hoping to have something about 1.5m x 2m, so it will be a large single bed blanket. I just hope he still likes it by the time I've finished it!

Here is how far along I am - as of today, I have 26 squares done, roughly an eighth of the way.


Wish me luck! I think I'm going to need it!

Saturday, April 9, 2011

my first crochet project

Not too long ago, I got the urge to learn to crochet. As with any newly learnt craft skill I quickly became obsessed, and approached it the usual way. Dive in head-first, avoid patterns, and learn only what I need to complete the first thing I decide to make. I really can't recommend this approach at all, it has resulted in far too many UFO's (unfinished objects) over the years! It is only thanks to the craft itself here that I did actually finish my first ever crochet project. Crochet has an addictive quality, and as my first project was granny squares, the bite size pieces give you lots of opportunities to feel a sense of accomplishment. The first square - AWESOME! First ten, YAY! A neat stack you can photograph, Woo Hoo! and so on.

This project came about because I am an awfully slow knitter. I have only ever finished simple scarves, and they take me about two months. Because of this I ended up with a lovely stash of yarn that clearly would be sitting there for years waiting to be knitted up.

For this project I went with some yummy Twilley's of Stamford cotton. I had only the vaguest of plans at this stage - perhaps it would be a little sofa throw? I didn't know how far the yarn would go until I had used a whole ball.


Oh the sense of accomplishment! My first little stack of granny squares! Now we have to fast forward this bit of the project, because I forgot to take any more pictures. I forged ahead and simply turned all the yarn into granny squares. I tossed about ideas like, should I buy more yarn and make it a nice big throw? How was I going to join the squares together? What colour should I use to join them, now that I've used up all the yarn?

Then I realised I'd better keep it short and sweet, and get something finished. Abandoning any plans to make anything large, after playing with the squares for a while I decided on one big cushion. So I just started sewing them all together, using my crochet hook. Now I really wish I had seen this tutorial over at Attic24 before I rushed into this step. Because then you wouldn't be able to see the joining yarn! Live and learn!


Fortunately I did see this tutorial at Attic24 just before I finished sewing the squares together. It inspired my final decision to make two cushions with envelope style linen backs. Because I couldn't see how I would finish the cushion quickly and simply if the whole thing was crocheted front and back, and still be able to remove the insert! I also decided the crochet would need a piece of backing fabric, it was too gappy to simply pop in any old insert.


And once again - as I rushed through the final stages we go from the above just sewn together cushion front to...


The final cushions! I did so many things wrong it's best you didn't see all that inbetween stuff anyway!
 And the backs with their overlap envelope opening, easy peasy with no buttons, snaps, ties or zips.


I do love them, they are snuggly and feel lovely and huggable - with zero itch factor for this family full of wool-itchers. But most of all I am just so chuffed to have finished them! I have started my next project, initially learning nothing from my previous mistakes as I plowed straight in to my cotton stash. I will tell you all about it very soon, and you'll be proud of me - I have started planning how it's going to work!

Friday, January 21, 2011

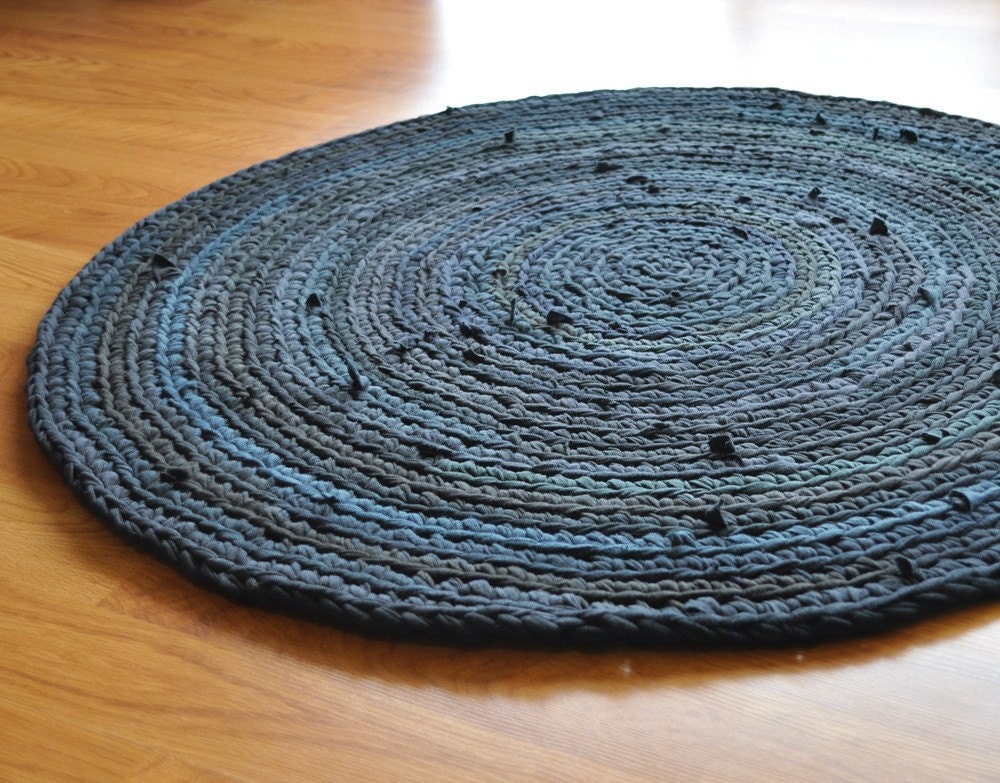
*want!*


How absolutely gorgeous, this rug would be perfect for in front of my new fireplace! Check out lots of other stunning up-cycled, re-cycled, custom crocheted rugs by EKRA here.

LinkWithin

Related Posts with Thumbnails